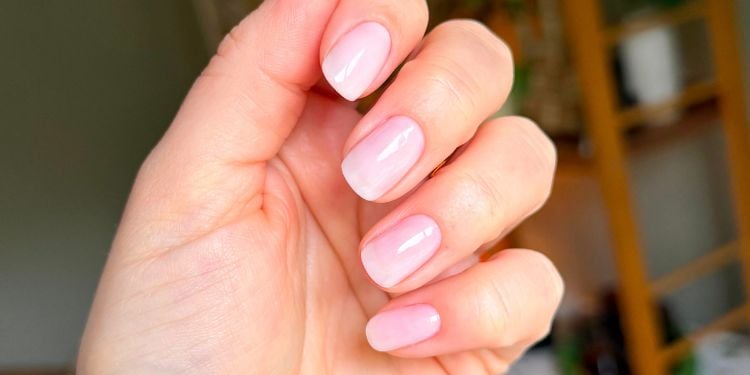


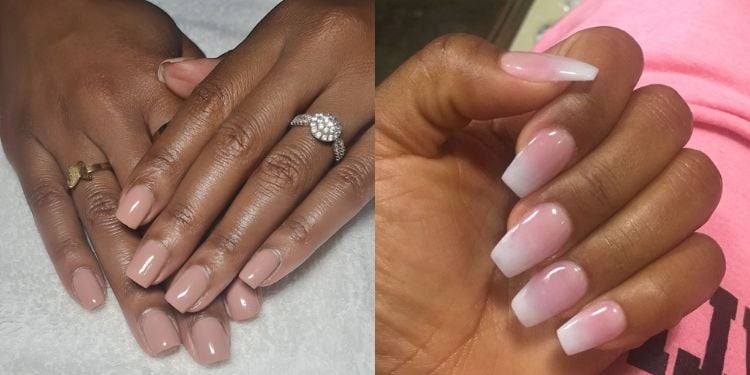
Builder gel nails have become one of the most popular nail enhancements, offering an alternative for people looking to strengthen natural nails or create extensions without acrylics.
Nail professionals emphasize that the key to successful builder gel application lies in proper nail preparation, correct apex placement, and the use of a slip layer to create a smooth, self-leveling structure.
According to guidance published by Builder Gel Nails and professional nail educators, builder gel is a thick UV/LED-cured product designed to reinforce natural nails.
In addition, the builder gel adds length and creates a stronger nail structure that can last between two and four weeks when properly applied.
Preparation of Builder Gel Nails Application
Before any builder gel is applied, the nail plate must be properly prepared to improve adhesion and reduce lifting.
Beauty Launchpad notes that correct preparation creates the foundation needed for a strong apex and long-lasting enhancement.
The preparation process for the nails begins by pushing back the cuticles and removing non-living tissue from the nail plate.
“The complete nail prep sequence is file and shape, push back cuticles, remove cuticle from the nail plate, buff the nail surface, clean with alcohol, apply dehydrator, apply primer, then apply base coat,” Artistic Touch Professional Nail Training Academy directs.
Nail technicians then lightly buff the nail surface using a fine-grit buffer, remove dust, and apply a dehydrator, with some systems requiring a primer for clients prone to lifting.
A thin base coat is then applied and cured according to the manufacturer’s instructions.
Also Read: Gel Nails vs Acrylic Nails: Pros, Cons, Cost, and Which Is Better for You
Application of the slip layer
One of the most important techniques in modern builder gel application is the use of a slip layer.
A slip layer is a very thin, uncured film of builder gel applied across the nail before the main bead of gel is placed.
According to professional tutorials referenced by Builder Gel Nails and Beauty Launchpad, the purpose of the slip layer is to allow the builder gel bead to glide smoothly across the nail rather than dragging and creating uneven bumps.
Experts recommend keeping the slip layer extremely thin, at roughly 10 to 20 percent of the total gel volume used on the nail.
The layer should appear glossy and wet but should not add noticeable bulk for a balanced nail structure.
Nail Apex
The apex is described as the most important structural element of a builder gel nail.
According to Builder Gel Nails, the apex is the highest and thickest point of the enhancement and is designed to absorb stress that would otherwise cause the nail to crack or break.
For most natural nails, the apex is positioned approximately 40 to 50 percent of the way from the cuticle toward the free edge.
For longer nail extensions, the apex may need to be moved slightly forward to compensate for the additional length.
Nail educators caution that placing the apex too close to the cuticle can create a bulky appearance and increase the risk of lifting.
On the other hand, positioning it too far toward the tip can weaken the stress zone and increase the likelihood of breakage.
Builder Gel Nails structure
After applying the slip layer, a medium bead of builder gel is placed near the center of the nail, directly over the intended apex area.
The gel is then gently floated toward the cuticle while maintaining a small gap to prevent flooding the skin.
Any remaining gel product during application is moved toward the free edge and sidewalls to create an even shape.
Additionally, the cuticle area should remain thin and seamless, while the apex forms the thickest point of the nail.
Further, the side profile should show a smooth arch rather than flat spots or sharp ridges.
Also Read: How to Do Gel Nails at Home: Step-by-Step Beginner Guide for Salon-Quality Results
Using gravity to Achieve a Smooth Finish
Builder gel is designed to self-level, meaning it naturally settles into a smooth surface when handled correctly.
For a smooth finish, many nail technicians prefer to turn the client’s hand upside down for five to ten seconds before curing using the gravity technique to gather the builder gel in the stress area and enhance the apex.
A liner brush may also be used to correct dents, sidewall overflow, or uneven product distribution before curing.
Professionals often recommend a short flash cure lasting 10 to 20 seconds to lock the shape in place before performing the full cure.
Once the nail has been fully cured, the technician can inspect the surface and lightly refine the shape using a file if necessary.
Experts advise against excessive filing because over-filing can remove structural support from the apex.
Instead, filing should focus on smoothing minor imperfections and blending the overall shape.
The service is completed with a gel color or topcoat, followed by curing and the application of cuticle oil.
Follow our WhatsApp Channel and X Account for real-time news updates.